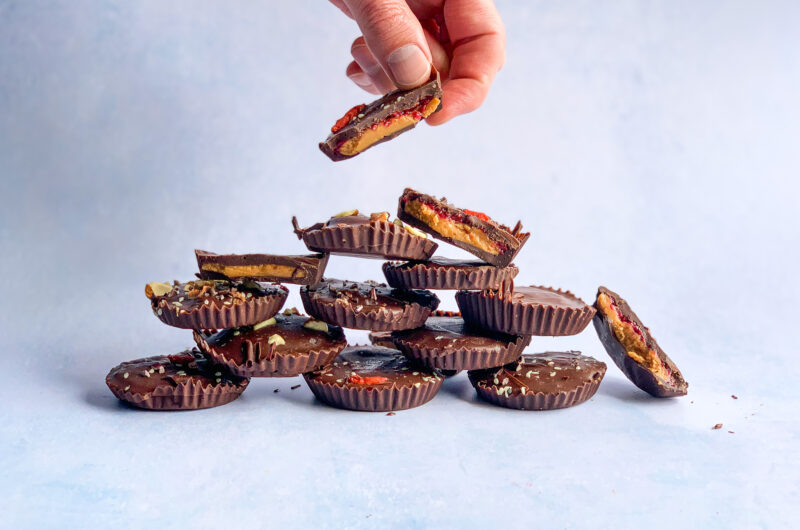
Peanut butter jelly cups are a delectable combination of creamy peanut butter and tangy raspberry chia seed jam, covered in dairy-free chocolate.
These treats are perfect for satisfying sweet cravings while offering a healthier alternative to traditional peanut butter cups.
Loved by both kids and adults they are a go-to recipe for any occasion.
This recipe is part of my Feel Good Treats Summer series, where we’re all about enjoying your favorite treats but making them healthier so you feel really freaking good! All the treats are damn delicious and also happen to be gluten-free, dairy-free, refined sugar-free, anti-inflammatory, and mostly vegan.
I started developing these feel-good treats after being diagnosed with Lyme disease. Check out the story and video here!
Watch the how-to video for this recipe on Instagram and TikTok.
‘Peanut Butter Jelly Time’ Cups
Course: Refined Sugar Free, Gluten Free, Dairy Free, Vegan12
servingsIngredients
1 ¾ cups dairy free choc chips, divided
½ cup natural peanut butter (unsweetened)
1 ½ Tablespoons maple syrup
1-2 Tablespoons oat flour
Pinch of salt
3 tablespoons of raspberry chia seed jam (see below)
Maldon flakey salt or sea salt
Optional toppings: Chopped peanuts, cacao nibs, sesame seeds, almond slivers
- Raspberry Chia Seed Jam (makes 8 oz)
2 cups frozen (or fresh) raspberries
1 Tablespoon maple syrup
1 teaspoon vanilla extract
2 Tablespoon chia seeds
Directions
- Step 1 – Chocolate Base
- Set out 12 regular muffin tins on a baking sheet.
- Melt 1 cup of your chocolate chips in a microwave or in a double boiler **
- Add a spoonful (about ½ tablespoon) of melted chocolate to the bottom of each muffin tin. Swirl the muffin cup by tipping it on its side and rotating it to ensure the melted chocolate goes about ¼-½ inch up the sides (you can also use a spoon to push it up onto the sides). You want a thin layer on the bottom, but ensure it is fully covered without gaps.
- Once all 12 muffin tins have been coated, place the tray in the freezer to set.
- Step 2 – Middle Filling
- In a medium bowl, mix together nut butter, maple syrup, oat flour* and salt.
* Nut butter consistency varies greatly between brands. Depending on how dry or oily your nut butter is, you may need more or less oat flour. The mixture should no longer have the oily sheen and turn slightly doughier – enough that you could handle it with your hands. - Step 3 – Chia Seed Jam
- Place raspberries and maple syrup into a small pot and thaw over medium heat, stirring frequently. Mash the berries until it is a loose consistency. Bring to a simmer.
- Add vanilla and chia seeds. Continue to simmer, stirring frequently for 3-5 minutes until it begins to thicken slightly. Remove from heat and let cool.
- The jam will continue to thicken slightly while cooling.
- Transfer to a glass jar and store in the fridge for 1-2 weeks. Enjoy!
- Step 4 – Filling the Cup
- Once the chocolate is set (5-10 minutes) remove the muffin tins from the freezer. Take a small spoonful (about ½ tablespoon) of mixture and roll it into a ball in your hands, and then press flat into a disk with your palms.
- Place nut butter disk into the base of the chocolate. You can also simply spoon in the nut butter mixture and press flat with a spoon.
- Top with 1+ teaspoon of chia raspberry jam and press flat so that it forms a thin layer reaching the sides.
- Step 5 – Completing the Cup
- Melt remaining ¾ cup of chocolate in your double boiler or microwave. Once melted, spoon the melted chocolate onto each cup, fully covering the nut butter center and ensuring it reaches all sides.
- Sprinkle the top with flakey sea salt and optional toppings. Place the tray in the freezer until set. Store in fridge or freezer. ENJOY!
Notes
- **Create a double boiler by bringing a medium pot filled a little less than halfway with water to a simmer.Place a heatproof bowl that’s just big enough to sit on top of the pot (ensure the bottom of the bowl does not touch the water) and add 1 cup of chocolate chips to the bowl, stirring frequently until fully melted.

Comments +